[[{“value”:”
Table of Contents
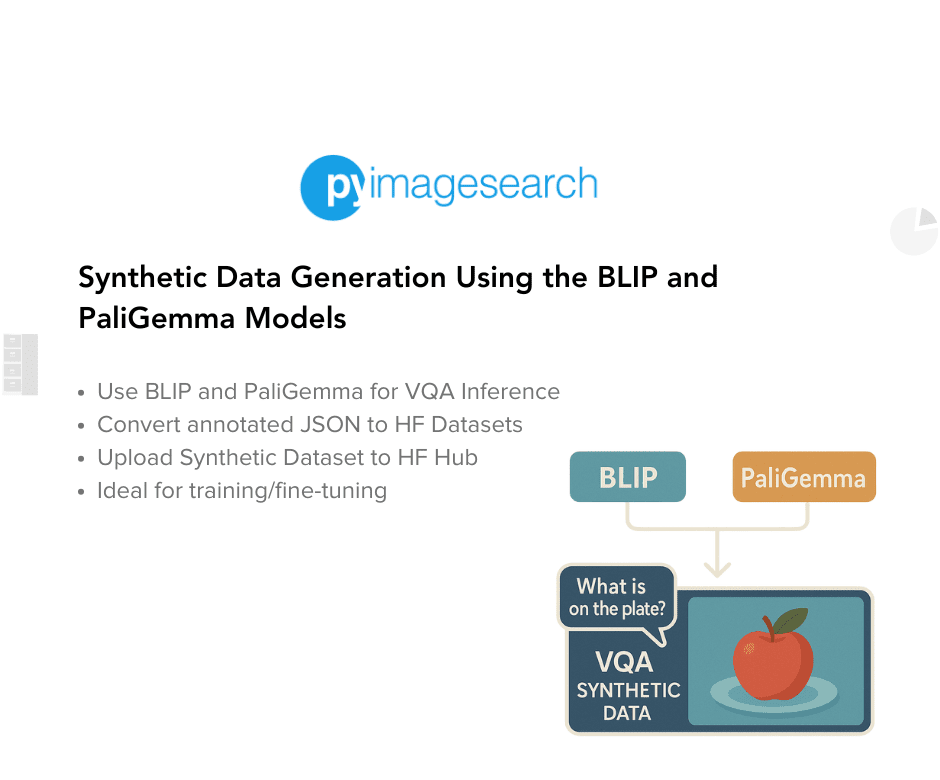
Synthetic Data Generation Using the BLIP and PaliGemma Models
In this tutorial, we embark on the first part of a two-part series where we demonstrate how to build a synthetic Visual Question Answering (VQA) dataset using a VLM-as-Judge methodology. High-quality synthetic data generation is crucial for scaling vision-language research without incurring prohibitive annotation costs. In Part 1, we will focus on:
- Running inference on a standard VQA corpus with two open-source Vision-Language Models (VLMs): Salesforce’s Bootstrapping Language-Image Pre-training (BLIP) and Google’s PaliGemma.
- Collecting responses to predefined questions for each image.
- Packaging these responses into a Hugging Face Dataset ready for downstream tasks.
Part 2 will build on this work by employing a third model (Qwen) as our judge to compare and curate the best annotations, closing the loop on our VLM-as-Judge pipeline.
This lesson is the 1st in a 2-part series on Synthetic Data Generation Using the VLM-as-Judge Method:
- Synthetic Data Generation Using the BLIP and PaliGemma Models (this tutorial)
- Synthetic Data Generation Using the VLM-as-Judge Method
To learn how to create your own synthetic data using the BLIP and PaliGemma models, just keep reading.
Why VLM-as-Judge and Synthetic VQA
Visual Question Answering (VQA) tasks require a model to answer open-ended questions about an image, combining vision understanding with language generation. Producing large-scale VQA datasets by hand is expensive and time-consuming. Instead, we can synthesize annotations by running inference through pretrained VLMs.
However, not all model outputs are equally reliable. Enter the concept of VLM-as-Judge: we use one VLM (Qwen) as a demonstration purpose to evaluate annotations generated by other VLMs, selecting the highest-quality responses automatically. In our two-part series:
- Part 1: Generate raw annotations from BLIP and PaliGemma.
- Part 2: Use Qwen as a judge to compare and refine these annotations.
This approach lets us scale VQA dataset creation while maintaining high annotation quality.
How would you like immediate access to 3,457 images curated and labeled with hand gestures to train, explore, and experiment with … for free? Head over to Roboflow and get a free account to grab these hand gesture images.
Configuring Your Development Environment
To follow this guide, you need to have the following libraries installed on your system.
!pip install -q -U transformers datasets
We install transformers to load the BLIP and PaliGemma models and its associated processors and datasets for loading and handling the dataset.
Need Help Configuring Your Development Environment?
All that said, are you:
- Short on time?
- Learning on your employer’s administratively locked system?
- Wanting to skip the hassle of fighting with the command line, package managers, and virtual environments?
- Ready to run the code immediately on your Windows, macOS, or Linux system?
Then join PyImageSearch University today!
Gain access to Jupyter Notebooks for this tutorial and other PyImageSearch guides pre-configured to run on Google Colab’s ecosystem right in your web browser! No installation required.
And best of all, these Jupyter Notebooks will run on Windows, macOS, and Linux!
Set Up and Imports
Once installed, we import the required dependencies.
import os
import json
import torch

from tqdm import tqdm
from PIL import Image

from datasets import load_dataset, Dataset, Features, Value, Image
from transformers import pipeline, AutoProcessor, PaliGemmaForConditionalGeneration
We import os to create directories, list files, and build file paths, json to serialize model outputs into JSON files and deserialize them for dataset construction, torch to leverage tensor operations under the hood, tqdm to display progress bars during long-running loops, and Image from PIL to open and manipulate images.
From the datasets library, we import load_dataset to pull existing Hugging Face datasets, Dataset to build custom datasets from Python lists, Features, Value, and Image to define the schema, ensuring images and text fields are handled correctly.
From the transformers library, we import pipeline to run BLIP’s visual-question-answering with minimal code, AutoProcessor to preprocess paired image-and-text inputs for PaliGemma and PaliGemmaForConditionalGeneration to load and generate answers with the PaliGemma model.
Download Images Locally
Now, to generate raw annotations from BLIP and PaliGemma and create the first part of the synthetic VQA dataset, we will need the following:
- images
- question prompt on which the above two models will generate responses given images.
Here, we will first extract a few images from a subset dataset of the big VQAv2 dataset created by merve here.
vqav2_small_ds = load_dataset("merve/vqav2-small")
We will first load the dataset using the load_dataset function.
vqav2_small_ds
Let’s print the dataset to verify its structure.
DatasetDict({
    validation: Dataset({
        features: ['multiple_choice_answer', 'question', 'image'],
        num_rows: 21435
    })
})
We can see that this dataset contains multiple_choice_answer, question, and image.
We need images from this dataset as we will be forming our own question prompt, and the models will generate responses based on the question prompt and the image.
val_ds = vqav2_small_ds["validation"]

# Output folder to save images
image_folder = "images"
os.makedirs(image_folder, exist_ok=True)

# Iterate through the dataset and download each image
for i, example in enumerate(tqdm(val_ds, desc="Downloading images")):
   image = example["image"]
   # Use i or another unique ID if "question_id" isn't available
   filename = f"{i}.jpg"
   path = os.path.join(image_folder, filename)
   image.save(path)
We start by taking the validation split of the VQAv2 subset since it has a validation split only. Well, the split doesn’t matter here because we only care about the images.
Next, we ensure there is a local directory ready to store these images. We call os.makedirs, which creates the images folder if it doesn’t already exist and avoids raising an error if it does. This step guarantees that all subsequent image saves have a valid destination.
Finally, we loop through each example in the validation dataset, using enumerate together with tqdm to display a progress bar labeled "Downloading images". For each iteration, we extract the PIL image object from example["image"], generate a unique filename based on the loop index (e.g., 0.jpg, 1.jpg, etc.), and construct the full file path with os.path.join. We then call image.save to write the image file to disk, effectively downloading and storing every image into our local images directory.
We, too, get a nice output indicating the download is 100% complete, extracting all 21,435 images.
Downloading images: 100%|██████████| 21435/21435 [01:48<00:00, 196.80it/s]
Inference with the Salesforce BLIP Model
Now, we have our images downloaded and saved in the images directory. We can move on to run inference with the two models (BLIP and PaliGemma) given a set of questions and images.
First, we will start with the Salesforce BLIP Model.
# Set input and output paths
image_folder = "images"
output_file = "synthetic_annotations.json"

# Define the questions to ask each image
questions = [
   "What is happening in this image?",
   "How many people are present in the image?",
   "What objects do you see?",
   "What is the main subject of the image?"
]

# Setup device (GPU if available)
device = 0 if torch.cuda.is_available() else -1

# Load the BLIP VQA pipeline
vqa_pipeline = pipeline(
   task="visual-question-answering",
   model="Salesforce/blip-vqa-base",
   device=device
)

results = {}

# Sort and process image files (assumes numeric filenames like 1.jpg, 2.png, etc.)
image_files = sorted(
   [f for f in os.listdir(image_folder) if f.lower().endswith((".png", ".jpg", ".jpeg"))],
   key=lambda x: int(x.split(".")[0])
)

# Process only the first 5 images for speed
for filename in tqdm(image_files, desc="Processing images"):
   image_path = os.path.join(image_folder, filename)
   results[filename] = {}

   for question in questions:
       answer_list = vqa_pipeline(image=image_path, question=question, top_k=1)
       if isinstance(answer_list, list) and len(answer_list) > 0:
           answer = answer_list[0].get("answer", "")
       else:
           answer = ""

       results[filename][question] = {
           "answer": answer
       }

# Save results to a JSON file
with open(output_file, "w") as out_file:
   json.dump(results, out_file, indent=2)

print(f"Saved synthetic VQA annotations to: {output_file}")
We begin by specifying the location of our images and where we want to save our synthetic annotations. We set image_folder and output_file so that all downstream steps read from and write to the correct locations. Next, we define a list of four generic VQA questions that will be asked of every image in our collection.
"What is happening in this image?""How many people are present in the image?""What objects do you see?""What is the main subject of the image?"
After that, we check for GPU availability, allowing the BLIP pipeline to run on CUDA when possible or falling back to CPU otherwise. We then initialize the BLIP VQA pipeline, giving us a one-line interface for inference. We specify task as visual-question-answering and model as Salesforce/blip-vqa-base.
To ensure deterministic ordering, we list and sort all image filenames that end in .png, .jpg, or .jpeg, converting the numeric portion before the extension to an integer for the correct sort order.
With our pipeline and file list ready, we loop over each image using tqdm to show progress. For each filename, we build the full path with os.path.join and initialize an empty dict in results[filename]. We then iterate through every question, calling vqa_pipeline to retrieve the top answer (top_k=1). We guard against unexpected outputs by checking that the returned list isn’t empty before extracting answer_list[0]["answer"] or defaulting to an empty string. Each answer is stored under its corresponding question key.
Finally, once all images and questions have been processed, we open synthetic_annotations.json in write mode and serialize the entire results dictionary with json.dump. A simple print statement confirms that our synthetic VQA annotations have been saved and are ready for the next steps in our pipeline.
We can see the progress at each stage down below with a final message: Saved synthetic VQA annotations to: synthetic_annotations.json.
Device set to use cuda:0
Processing images: 100%|██████████| 21435/21435 [2:07:53<00:00,  2.79it/s]
Saved synthetic VQA annotations to: synthetic_annotations.json
NOTE:
- This inference took around 2.5 hours to run on an A100 GPU.
- Also, be sure to save your JSON file somewhere in your local system. This JSON file will be needed in Part 2.
Convert JSON File to the Hugging Face Dataset Format
We have generated responses from the BLIP model given a set of questions and images and saved them in JSON format. To make the created synthetic dataset easily accessible to everyone, let’s convert this JSON file to Hugging Face Dataset format and later push this to Hugging Face Hub.
# Load annotations
with open("synthetic_annotations.json") as f:
   data = json.load(f)

examples = []

# Build dataset examples with actual image data
for img_name, qa_pairs in data.items():
   image_path = f"images/{img_name}"
   for question, answer_data in qa_pairs.items():
       examples.append({
           "image": image_path,
           "question": question,
           "answer": answer_data["answer"]
       })

# Define the features explicitly with Image support
features = Features({
   "image": Image(),  # This will load and store image data, not just the path
   "question": Value("string"),
   "answer": Value("string"),
})

# Create dataset
dataset = Dataset.from_list(examples, features=features)
We start by loading the JSON file that holds our BLIP-generated annotations. By calling json.load, we read back the nested dictionary where each key is an image filename and its value is another dict mapping questions to answer objects.
Next, we transform that raw structure into a flat list of examples suitable for Hugging Face’s Dataset API. We initialize an empty list called examples and then loop over each img_name, qa_pairs pair in our data dict. For each image, we construct the full image_path by prepending "images/" to the filename, and for each question, answer_data in the inner dict, we append a new dict with keys "image", "question", and "answer", pulling out the actual answer string from answer_data["answer"].
Once we have our list of examples, we explicitly define the schema using a Features object. We declare the "image" field as an Image() type so that downstream consumers will load the image bytes rather than just treating it as a path, and we define both "question" and "answer" as Value("string") to ensure they’re recognized as text fields.
Finally, we call Dataset.from_list to instantiate our Hugging Face Dataset. At this point, our synthetic VQA dataset combines real image data with model-generated question-answer pairs, fully structured and ready for training or evaluation in any vision-language pipeline.
Inspect One Sample from the Dataset
To verify that our dataset was constructed correctly, we pull a single example and print it:
print(dataset[0])
When we execute this, we see output similar to:
{'image': <PIL.JpegImagePlugin.JpegImageFile image mode=RGB size=640x424 at 0x7C20E8A58610>, 'question': 'What is happening in this image?', 'answer': 'carnival'}
Here, the image field is a PIL image object (in this case, a 640×424 RGB JPEG), confirming that the Image() feature correctly loaded the actual image data rather than just its file path. The question field is the string we posed to the model, and the answer field is the corresponding model-generated response ("carnival").
By inspecting this sample, we validate that each entry in our synthetic VQA dataset contains the proper types and values needed for downstream training or analysis.
Push the Dataset to the Hugging Face Hub
We’re now ready to share our newly created synthetic VQA dataset using the BLIP-generated response with the community. We call the push_to_hub method to upload the dataset under the repository name cosmo3769/synthetic_vqa_dataset_21.4k_images_salesforce_blip_vqa_base, making it publicly discoverable and versioned on the Hub.
# Save to Hugging Face Hub
dataset.push_to_hub("cosmo3769/synthetic_vqa_dataset_21.4k_images_salesforce_blip_vqa_base")
The dataset can be found here.
Inference with the Google PaliGemma Model
Before we can bring in our third model as the “judge,” we need at least two independent sets of annotations for each image and question. So far, we’ve generated one set of responses using BLIP.
In the next step, we’ll run the same images and question prompts through Google’s PaliGemma model to obtain a second, complementary set of answers.
Once we have both BLIP’s and PaliGemma’s outputs, we’ll be ready to feed them into a third VLM (i.e., Qwen) to compare and select the higher-quality annotation for each image-question pair, completing our VLM-as-Judge synthetic VQA pipeline.
image_folder = "images"  # Your folder with images
output_file = "vqa_synthetic_annotations.json"

questions = [
   "Question: What is happening in this image?nAnswer:",
   "Question: How many people are present in the image?nAnswer:",
   "Question: What objects do you see?nAnswer:",
   "Question: What is the main subject of the image?nAnswer:"
]

device = "cuda" if torch.cuda.is_available() else "cpu"

model_id = "google/paligemma2-3b-mix-224"
print(f"Loading model {model_id} on {device} ...")
processor = AutoProcessor.from_pretrained(model_id)
model = PaliGemmaForConditionalGeneration.from_pretrained(model_id).to(device)

results = {}

image_files = sorted(
   [f for f in os.listdir(image_folder) if f.lower().endswith((".png", ".jpg", ".jpeg"))]
)

for img_name in tqdm(image_files, desc="Processing images"):
   img_path = os.path.join(image_folder, img_name)
   image = Image.open(img_path).convert("RGB")

   results[img_name] = {}

   for question_prompt in questions:
       # Prepare inputs
       inputs = processor(text=question_prompt, images=image, return_tensors="pt").to(device)

       # Generate answer tokens
       outputs = model.generate(**inputs, max_new_tokens=64)

       # Decode output tokens
       answer = processor.decode(outputs[0], skip_special_tokens=True)

       # Clean answer (remove question prompt from generated text if repeated)
       answer = answer.replace(question_prompt.replace("Answer:", "").strip(), "").strip()

       results[img_name][question_prompt.replace("Question:", "").replace("Answer:", "").strip()] = answer

# Save all Q&A results to a JSON file
with open(output_file, "w") as f:
   json.dump(results, f, indent=2)

print(f"nSaved VQA synthetic annotations to {output_file}")
We first specify where our images live and where we want to dump the model’s outputs. We set image_folder and output_file to organize all I/O, and we define a list of four question prompts — each formatted as "Question: <your question>nAnswer:". This explicit prompt template helps the conditional‐generation model understand where the question ends and the answer begins.
We detect GPU availability and assign model_id to google/paligemma2-3b-mix-224 as we will be using the PaliGemma mix model (3b, 224×224) to generate the responses. Then print a log message (Loading model {model_id} on {device} ...) for transparency.
We then load the PaliGemma processor via AutoProcessor.from_pretrained to handle tokenization and image preprocessing, and we move the PaliGemmaForConditionalGeneration model to the chosen device so that subsequent .generate() calls run efficiently.
We list all files in images/ ending with .png, .jpg, or .jpeg, sort them alphabetically (so that “1.jpg” comes before “10.jpg”), and wrap the loop in tqdm to display a "Processing images" progress bar.
For each img_name in our sorted list, we open the image with PIL (Image.open), create an empty dict in results[img_name], then iterate through every question_prompt. Inside that inner loop, we:
- Call
processor()and move the resulting tensors to our device. - Invoke
model.generate()to sample up to64answer tokens. - Decode the output tokens with
processor.decode()to get a raw string. - Strip out any repeated prompt text via
answer.replace(...), leaving only the model’s answer. - Use the cleaned prompt text (removing
"Question:"and"Answer:") as the key underresults[img_name]and assign the cleaned answer string as its value.
Once all images and prompts have been processed, we open vqa_synthetic_annotations.json in write mode and call json.dump() to serialize our nested dictionary. A final print statement confirms success.
NOTE:
- This inference took around 4 hours to run on an A100 GPU.
- Also, be sure to save your JSON file somewhere in your local system. This JSON file will be needed in Part 2.
Convert JSON File to the Hugging Face Dataset Format
Let’s again convert the JSON format file to the Hugging Face Dataset format and push this to Hugging Face Hub.
# Load annotations from PaliGemma output
with open("vqa_synthetic_annotations.json") as f:
   data = json.load(f)

examples = []

for img_name, qa_pairs in data.items():
   image_path = f"images/{img_name}"
   for question, answer in qa_pairs.items():
       # Clean up answer: remove leading/trailing whitespace and repeated "Answer:"
       answer = answer.strip()
       if answer.lower().startswith("answer:"):
           answer = answer[len("answer:"):].strip()

       examples.append({
           "image": image_path,
           "question": question,
           "answer": answer
       })

# Define features for Hugging Face Dataset
features = Features({
   "image": Image(),
   "question": Value("string"),
   "answer": Value("string"),
})

# Create dataset
dataset = Dataset.from_list(examples, features=features)
First, we load the JSON file containing our PaliGemma annotations and transform it into a flat list of examples suitable for the Hugging Face Dataset API. We open "vqa_synthetic_annotations.json" and call json.load to retrieve a dictionary where each key is an image filename and each value is another dict mapping questions to raw answer strings.
We then initialize an empty list named examples and loop over each img_name, qa_pairs pair. Inside that loop, we build image_path and iterate through each question, answer pair. Before appending to our examples list, we clean up the answer by stripping whitespace and removing any leading "answer:" prefix if present, ensuring that only the model’s actual response remains.
Next, we explicitly declare our dataset schema and instantiate the Dataset. We create a Features object with three fields:
"image": set toImage()so that each record will load the actual image bytes rather than just a path"question": set toValue("string")"answer": set toValue("string")
Finally, we call Dataset.from_list(examples, features=features) to construct a Dataset object that binds our cleaned examples to the defined schema. At this point, our PaliGemma-based synthetic VQA dataset mirrors the structure of the BLIP dataset from Part 1 and is ready for the next step of pushing to the Hugging Face Hub or serving as input to our “judge” model in Part 2.
Inspect One Sample from the Dataset
Let’s again verify the dataset.
print(dataset[5])
We can see a similar dataset structure to the one we created before using the BLIP model.
{'image': <PIL.JpegImagePlugin.JpegImageFile image mode=RGB size=640x457 at 0x7E173D8BD350>, 'question': 'How many people are present in the image?', 'answer': '6'}
Push the Dataset to the Hugging Face Hub
We are again ready to call the push_to_hub method to share our newly created synthetic dataset using the PaliGemma-generated response with the community.
# Save to Hugging Face Hub
dataset.push_to_hub("cosmo3769/synthetic_vqa_dataset_21.4k_images_google_paligemma2-3b-mix-224")
The dataset can be found here.
What’s next? We recommend PyImageSearch University.
86+ total classes • 115+ hours hours of on-demand code walkthrough videos • Last updated: August 2025
★★★★★ 4.84 (128 Ratings) • 16,000+ Students Enrolled
I strongly believe that if you had the right teacher you could master computer vision and deep learning.
Do you think learning computer vision and deep learning has to be time-consuming, overwhelming, and complicated? Or has to involve complex mathematics and equations? Or requires a degree in computer science?
That’s not the case.
All you need to master computer vision and deep learning is for someone to explain things to you in simple, intuitive terms. And that’s exactly what I do. My mission is to change education and how complex Artificial Intelligence topics are taught.
If you’re serious about learning computer vision, your next stop should be PyImageSearch University, the most comprehensive computer vision, deep learning, and OpenCV course online today. Here you’ll learn how to successfully and confidently apply computer vision to your work, research, and projects. Join me in computer vision mastery.
Inside PyImageSearch University you’ll find:
- ✓ 86+ courses on essential computer vision, deep learning, and OpenCV topics
- ✓ 86 Certificates of Completion
- ✓ 115+ hours hours of on-demand video
- ✓ Brand new courses released regularly, ensuring you can keep up with state-of-the-art techniques
- ✓ Pre-configured Jupyter Notebooks in Google Colab
- ✓ Run all code examples in your web browser — works on Windows, macOS, and Linux (no dev environment configuration required!)
- ✓ Access to centralized code repos for all 540+ tutorials on PyImageSearch
- ✓ Easy one-click downloads for code, datasets, pre-trained models, etc.
- ✓ Access on mobile, laptop, desktop, etc.
Summary
We wrap up Part 1 by showing how to generate and package synthetic VQA annotations using two open‐source VLMs: Salesforce BLIP and Google PaliGemma. We walked through:
- Downloading and saving images from a VQAv2 subset.
- Running BLIP’s visual‐question‐answering pipeline to produce answers for a set of predefined questions.
- Converting those outputs into a Hugging Face
Datasetwith proper image and text features. - Repeating the process with PaliGemma, including prompt formatting, generation, and answer cleaning.
By the end of this tutorial, you will have two fully formed synthetic VQA datasets — one from BLIP and one from PaliGemma — ready for comparison.
What’s Next?
In Part 2, we will:
- Load the two JSON annotation files generated here.
- Run the Qwen model over each image-question pair to act as our “judge,” scoring and comparing BLIP vs. PaliGemma answers.
- Assemble a curated synthetic VQA dataset by selecting the higher-quality answer for each sample.
Stay tuned for Part 2, where we complete our VLM-as-Judge pipeline and deliver a final, high-quality synthetic VQA dataset!
Citation Information
Thakur, P. “Synthetic Data Generation Using the BLIP and PaliGemma Models,” PyImageSearch, P. Chugh, S. Huot, A. Sharma, and P. Thakur, eds., 2025, https://pyimg.co/xiy4r
@incollection{Thakur_2025_synthetic-data-generation-using-the-blip-and-paligemma-models,
  author = {Piyush Thakur},
  title = {{Synthetic Data Generation Using the BLIP and PaliGemma Models}},
  booktitle = {PyImageSearch},
  editor = {Puneet Chugh and Susan Huot and Aditya Sharma and Piyush Thakur},
  year = {2025},
  url = {https://pyimg.co/xiy4r},
}
To download the source code to this post (and be notified when future tutorials are published here on PyImageSearch), simply enter your email address in the form below!

Download the Source Code and FREE 17-page Resource Guide
Enter your email address below to get a .zip of the code and a FREE 17-page Resource Guide on Computer Vision, OpenCV, and Deep Learning. Inside you’ll find my hand-picked tutorials, books, courses, and libraries to help you master CV and DL!
The post Synthetic Data Generation Using the BLIP and PaliGemma Models appeared first on PyImageSearch.
“}]] [[{“value”:”Table of Contents Synthetic Data Generation Using the BLIP and PaliGemma Models Why VLM-as-Judge and Synthetic VQA Configuring Your Development Environment Set Up and Imports Download Images Locally Inference with the Salesforce BLIP Model Convert JSON File to the Hugging…
The post Synthetic Data Generation Using the BLIP and PaliGemma Models appeared first on PyImageSearch.”}]] Read More Computer Vision, Hugging Face Datasets, Synthetic Data Generation, Tutorial, Vision-Language Models, blip, dataset generation, hugging face, image captioning, open source ai, paligemma, synthetic dataset, transformers, tutorial, visual question answering, vlm-as-judge, vqa